Showing posts with label recipe. Show all posts

Thursday, June 19, 2014

Eureka Moment with Homemade Kimchi

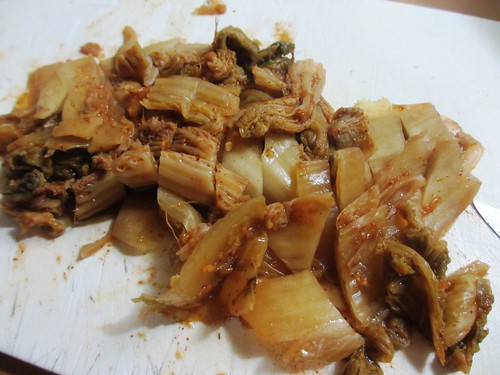
A few weeks ago, I decided to make my own kimchi at home. I really like the stuff-- it's vegetable and it's spicy! I followed this recipe loosely and eyeballed some of the ingredients. I used normal chili powder because I couldn't find any Korean chili powder in Landmark.
.

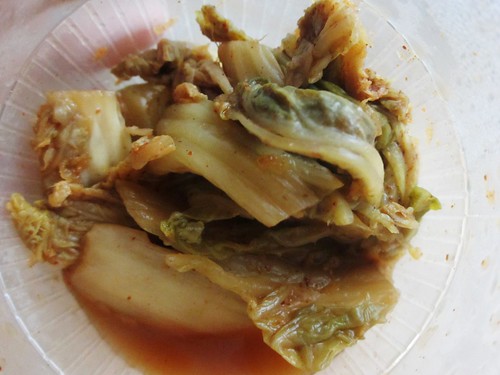
My kimchi didn't turn out to taste the same as those that I've tried in Korean restaurants. The smell and taste was a bit different and it was a bit too strong. It was good when eaten with meat and rice but I could not eat it on its own. Short version: it's a failure, lol.
.

I pondered if it was worth the effort of making kimchi-- what if I just bought the ones in jars found at the supermarket?

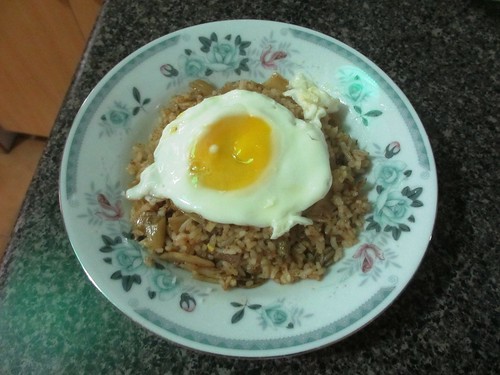
And then I had a little eureka moment when I saw leftover rice beside the kimchi in the fridge-- KIMCHI FRIED RICE! I searched for some recipes on the internet and found this. I didn't have some of the ingredients on hand and I wasn't in the mood for meat so I decided to go the most basic way:


Kimchi Fried Rice (serves 1)
  • 1-2 tbsp cooking oil
  • 3/4 cup cooked rice
  • 1/2 cup napa (Chinese cabbage) kimchi, chopped
  • 1/2 tbsp sesame oil
  • 1 egg
  1. Heat the oil in a pan and fry the egg.
  2. Leave around 1 tbsp of oil in the pan. Pour the rice into the pan and toss, making sure that the grains don't stick to one another.
  3. Add the kimchi and toss until cooked.
  4. At this point, you may add sesame oil, soy sauce, and/or juice from the kimchi.
  5. Serve on a bowl, top with fried egg.

I liked my end product! And I think it makes for a good breakfast because there's carbs, veggies, fat and protein. It's also simple and quick to make as long as you already have kimchi on hand.
.

I still haven't decided whether I'm making my own kimchi again or if I will just buy it next time. Maybe I'll do a couple more trials. Maybe I'll try again if and when I find Korean chili powder. However, for the meantime, I'm definitely making more kimchi fried rice!

Sunday, May 18, 2014

Recipe: Mango-Kani Salad

Because I always, always get disappointed by kani salads from restaurants, I decided that I'll just make my own.

Kani Salad (serves around 6)

Ingredients:
1 bunch of lettuce
2 medium-sized cucumbers
2 medium-sized ripe mangoes
8 pieces of short kani sticks (the ones that are around 3 to 3 1/2")
nori
roe / ikura (if you have access to them, unfortunately I don't)

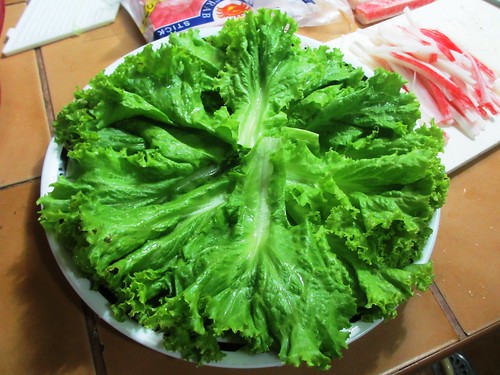
1. Cut up the lettuce and lay them into a bed.

.

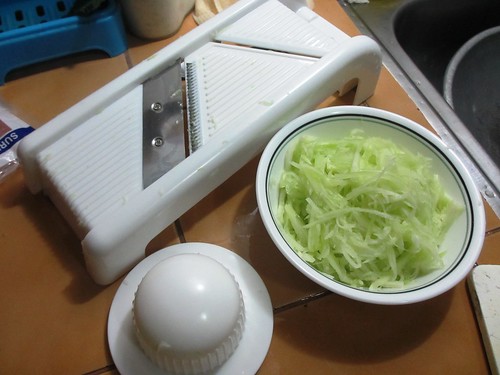
2. Peel the cucumbers, cut into half and then remove the seeds by scooping/scraping them out with a spoon. Cut into thin strips. 

The first time I made kani salad, I found this task rather tiring so I recently bought a mandoline slicer to help. I think it's a pretty good investment. I mean, I can hold a knife quite well, of course. However, if you're slicing a lot of veggies and fruits (e.g. for pickling or for veggie/fruit chips), this mandoline will cut [not just your vegetables but also] your prep time significantly. This mandoline is pretty easy to clean too. I got it from Landmark for ~PhP500.

.

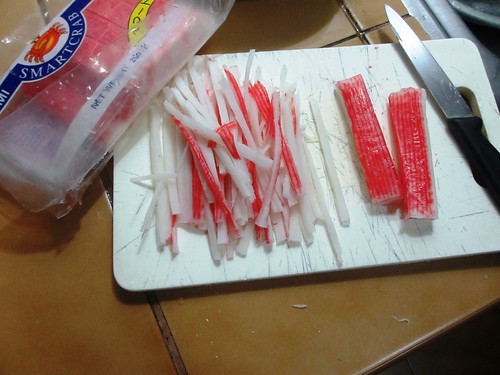
3. Slice the kani sticks into thin strips.

.

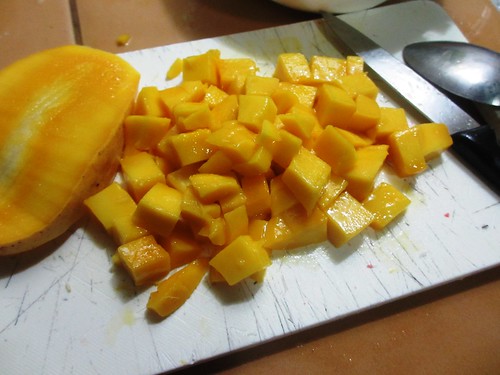
4. Cube the mangoes.

.

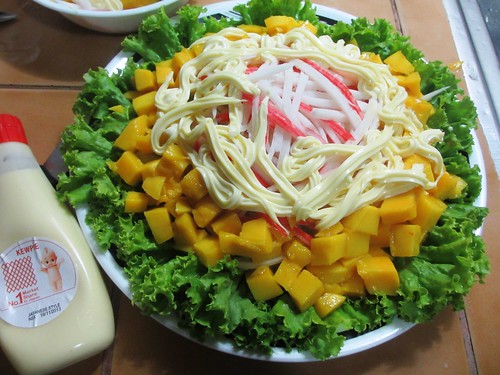
5. Arrange them all on a plate and add Japanese mayo.

.

I forgot to add some nori (cut into strips or into tiny squares with scissors) but you can do that. Add roe/ikura too if you have any.

Now this is was waaaay cheaper than those sold in restaurants and I love that I can adjust everything to my taste. You can actually ditch the lettuce and just use more cucumbers instead.

And just today, I actually got an idea of making mango-kani lettuce wraps. Next week, perhaps. :)

Sunday, February 3, 2013

Recipe: Tropical Buffalo Wings

I love spicy chicken wings! Recently, I learned a nice twist to it: MANGO. I got the idea from Chilli and Ink in Maginhawa Street and tried to execute it myself. I know it sounds a little unusual but it's worth a try (especially now that mangoes are in season).

Tropical Buffalo Wings

Original (non-tropical) version

Tropical Buffalo Wings

1 kg chicken wings
1/2 cup milk
1/3 cup flour
salt
pepper
cayenne (optional)

1/4 cup butter, melted
half a mango, pureed
chilli pepper sauce

1. Mix together milk, flour, salt, pepper and cayenne.
2. Coat the chicken with the batter. You may let it sit for an hour.
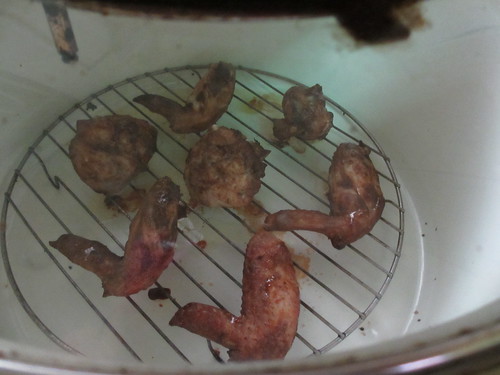
3. Cook the chicken until crispy. You can deep-fry it but I prefer using the convection roaster at 200 degrees C for 30 to 40 minutes (so that I don't have to use oil anymore and some of the chicken fat gets drained too).

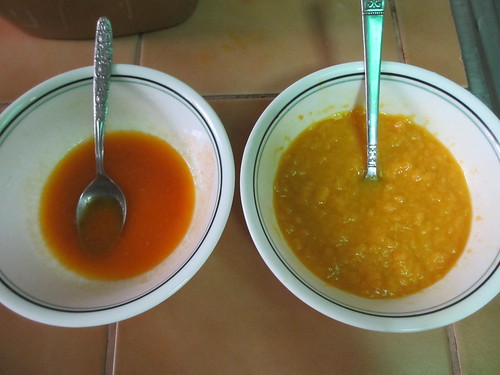
4. While the chicken is cooking, mix the melted butter, mango puree and enough chilli pepper sauce.
Left: butter and chilli sauce mixture. Right: mango puree.

5. After the chicken cooks, immediately dunk it into the butter-mango-chilli pepper mixture.
6. You can serve the wings with garlic mayo dip (mayo mixed with crushed garlic).

Sunday, January 27, 2013

Recipe: Tuna Curry Pasta (or Casserole)


My saving grace whenever I get random curry cravings (which happens quite often). You don't want to spend on those expensive blocks of Japanese curry roux in the supermarket? That's okay. I don't spend for those either.


Ingredients:
  • 1/4 cup + 2 tbsp olive or canola or vegetable oil
  • 1/4 cup flour
  • 2 to 4 tbsp curry powder
  • 4 cloves garlic, crushed
  • 1 small onion
  • 1 small carrot, optional
  • 1 can of tuna
  • salt
  • 1/4 cup water
  • cayenne pepper (optional)


Curry roux:
  1. Heat 1/4 cup oil in a small saucepan.
  2. On medium-high heat, add flour and stir with a wooden spoon until it turns golden.
  3. Reduce heat to low. Add curry powder to the paste. Turn off the stove.


Tuna curry sauce:
  1. In another saucepan, saute garlic and onion in 2 tbsp olive oil.
  2. Stir curry roux and water. Let it boil.
  3. Add carrots and let it cook.
  4. Add tuna and let it boil again.
  5. Put more curry powder or cayenne pepper if you want spicier curry.


Finally, pour the sauce on pasta. Or on rice. Or even on bread! 

Serves 1 to 2.

The color of my curry usually varies with how long I cook the flour.

Notes:
  • If the sauce seems a little too dry, add more water by tablespoonfuls until you reach your desired consistency.
  • I don't measure when I cook so the quantities are just rough estimates which you can change according to your taste.
  • The amount of curry powder to be used depends on the quality of your curry powder and on your taste.
  • You can add potatoes too.

Easy-peasy, right?

Sunday, July 29, 2012

A Tasty Mess

I'm normally OC but this is a mess I certainly wouldn't mind.


What I did with leftover grahams, bananas and homemade caramel. :) I've been craving dessert for the longest time but I was too busy today with my homework in EgyE (Energy Engineering) 201.

This dessert can be made fabulous by layering the three ingredients in a trifle glass or a pretty wine goblet!

Saturday, June 2, 2012

Hi Banoffee Pie!

I remember making banoffee pie last year. It wasn't a total success. It tasted good but I didn't cook the caramel the right way; it was too runny and the pie became a mess upon slicing.

Anyway, I made another attempt last Wednesday and I must say it has gotten better.


THE CRUST
For the crust, I used oatmeal and walnuts instead of graham crackers because we have lots of oatmeal here at home. I also have walnuts that I haven't been using. I initially wanted to put chopped walnuts to the caramel layer but that will be difficult to eat with my braces so I decided to crumb and mix it into the oatmeal crust instead. That way, the walnuts will also lend flavor to the not-so-tasty oatmeal crust.

Oatmeal-Walnut Crust
1 cup oats, milled (turned into crumbs)
1/2 cup walnuts, toasted and milled (turned into crumbs)
1/4 cup brown sugar
4 tablespoons melted butter or margarine

1. Preheat oven to 350 degrees F or 180 degrees C.
2. Mix all ingredients together and cut them together using a pastry cutter or two knives or two forks.
3. Press onto the bottom of a nine-inch pie plate.
4. Bake for 8 minutes or until set.

THE CARAMEL
A lot of banoffee pie recipes on the internet use caramel that's made of cooked condensed milk. They submerge a can of condensed milk in a pot of water and set it on the stove for two hours. I didn't want to do that for three reasons: (1) you cannot forget to replace the water in the pot as the can may explode if the water evaporates out, (2) I think cooking for two hours is a waste of gas if I can cook caramel in minutes and (3) I just wanted some homemade caramel.

For the caramel, you can use either of these recipes: ONE or TWO.


BANANAS
I used five bananas. Three would suffice but I like bananas heh heh.

WHIPPED CREAM
I lightly whipped some cream with minimal sugar.


ASSEMBLY
1. Pour caramel onto the cooled crust. Let the caramel cool until it is firm.
2. Arrange sliced bananas on top of the caramel.
3. Pipe or spread some whipped cream.
4. Dust with cocoa powder (optional).


I say it was pretty easy to make and it's not that expensive too!

Achievement unlocked!

Wednesday, November 2, 2011

Recipe: reversed California maki minus the roe

I dunno anymore if you can still call this California roll if the rice and the nori are in reverse and if it doesn't have roe (those tiny, translucent, orange spheres). But anyway...

During a sleepover in Airis's house a few years ago, her mom served us homemade California maki with the nori outside instead of the rice outside. I love Japanese food (and my family does too) so after that sleepover, I got the idea that I can actually make California rolls at home. I just searched the internet for tips on how to make them.


Of course it's not the same as how the Japanese make their sushi but I guess we can make do with it if it's just to appease our sushi cravings at home. California rolls sold in random places outside are also quite expensive but my homemade version is cheap, I promise. :)

What you need:
Short-grained rice. I was able to buy Japanese rice at SM Hypermarket for Php63/kilo.
Vinegar. You can buy vinegar imported from Japan in SM or Landmark. I don't know the brand, it's was written in kanji. But you can also use just any vinegar.
 Iodized salt.
Mangoes sliced into sticks.
Crabsticks.
Nori (dried seaweed).


Cook the rice first. While it's still hot, sprinkle vinegar and salt. Mix the rice thoroughly. The Japanese fan their sushi rice while mixing in wooden bowls with wooden spoons (I learned this from Cooking Mama, the Nintendo game hahaha). I don't have a wooden bowl but that's okay. I also mix in front of the electric fan to cool the rice faster.

Slice and peel the mangoes. You don't really need to slice the crabsticks.

Now you can assemble the California roll. People usually use those bamboo mats but I don't. Lay down the nori and spread the cooled rice evenly on the nori using a spoon. Don't spread the rice if it's still hot or the nori will break. Also, don't spread rice on the whole nori. Leave a bare strip one inch thick at the top edge.

Place the mangoes and crabsticks and then roll up to the bare strip you left at the top. Wrap firmly. Not too tight because the nori will break. Not too loose either because the California roll will break when you slice it. The moisture from the rice will bind the nori and seal your roll.


You now have these black tubes!

Finally, you can slice your California roll! When slicing, dip your knife in water first so that the rice won't stick too much to the knife. The water also aids in cutting the nori.


Prepare your dip! Soy sauce with calamansi or lemon. I buy wasabi paste from SM or Landmark. They come in slim green boxes labeled わさび (wasabi). Oh, don't buy too much wasabi that you can't consume. They expire quickly. After making your dip, dig in! I love making these rolls when Dad comes from field work in Davao and he brings home tuna sashimi with him. :))

Rolling takes practice. Before, I'd usually break the nori because my rice was too hot or I wrapped the roll too tightly. But yesterday, I was able to make ten rolls problem-free. So yeah, just practice. :) Next time, maybe I'll buy a bamboo mat and make California rolls "properly" (i.e. not reversed).

For ten rolls (around 100 slices, depending on how thick your slices are), I only spend around Php360. That's Php3.60 per piece, not bad at all.

It's still my dream to eat at a sushi bar with conveyor belts and color-coded plates. I've seen one at the food court in Taipei 101 but I think Sakae Sushi (there's a branch in SM North) also has conveyor belts so maybe I should try that soon. :)

Friday, August 12, 2011

Milk Tea, Mug Cake and Rose Petals

I discovered milk tea around second or third year college when my orgmates dragged me to Bubble Tea. Back then, Bubble Tea prices were still reasonable. Eventually, however, I stopped the Bubble Tea routine because their prices got too steep. And then I discovered Moonleaf in Magiting Street last November through Krinkle and Nadine and I love the place! Nowadays, I rarely have the time to go to Moonleaf so here's what I do when I'm craving for something.

Yakult Jasmine

Steep jasmine tea in a cup of boiling water for about ten minutes. Add sugar or milk (or creamer if you want). Pour into an ice-filled glass and then pour a bottle or two of Yakult. It's going to be like Yakult with a tinge of sampaguita. No, really. :))

One time I shared my jasmine Yakult with my brothers and here's the conversation:

Kuya: "Ano to?" *drinks*
Me: "Yakult na may sampaguita" (sampaguita is a kind of jasmine after all)
Kuya: "Pucha kaya pala kalasa ng air freshener ko."
Bunso: *drinks* "Ano to?! Lasang lason!"

There goes a typical conversation among us siblings.

But if you don't have Yakult at hand, you may want to try Muscovado Milk Tea. Steep some black tea in a cup of boiling water. Add muscovado sugar and milk. You may want it hot or iced. :)

I didn't give measurements because you have to adjust everything to your liking (even the steeping time of your tea).

And you know how well cake goes with tea. Lately, I haven't been able to bake cakes and cookies. Now here's what I do when there's Nutella at home and I'm craving for cake. Recipe is not mine. Found it somewhere in the internet but I forgot where. Tell me if it's yours so I can credit. :)


Nutella Mug Cake

Ingredients:
4 tablespoons self rising flour
4 tablespoons sugar
1 egg
3 tablespoons cocoa powder
3 tablespoons Nutella
3 tablespoons milk
3 tablespoons olive or vegetable oil

Procedure:
Combine all ingredients in a large coffee mug.
Whisk well with a fork until smooth.
Microwave on high for 1 1/2 – 3 minutes. (Time depends on microwave wattage. Mine took 1.5 minutes.)
Top with whipped cream and a little chocolate sauce if desired.

Reminders from me:
Don't overcook as the mug cake will turn rubbery.
If you think you've cooked the mug cake enough, remove it from the mug so as not to cook it any longer.
You may grease the mug with oil beforehand.
Also, this recipe yields quite a lot for a single mug so I actually mix it in a bowl and pour into two mugs.

Doesn't look as good as oven-baked cakes but good enough to appease cravings

I've tried making mug cakes before but they always end up rubbery. This recipe fixes the said problem using Nutella. :)

And here's something that made me happy last night while I was reviewing my ES 11 (Statics of Rigid Bodies) and making problems for our students to solve. Imagine studying and then suddenly you find these between the pages of your book...

Pressed rose petals!

I actually have a habit of pressing flower petals (and sometimes leaves) between books whenever I get the chance. (Un)fortunately, I don't get flowers a lot so I don't have much to press haha.


But honestly, I no longer remember where these roses came from (I don't even think they're mine... prolly my mom's) and I can't remember how long they've been pressed (although I'm sure it's been years).


Maybe I'll start pressing more flowers from here on and then put them into my books so that I'll get more surprises. That is if I have flowers to press. Haha.